Showing posts with label cooking school. Show all posts

Tuesday, August 9, 2016

Cooking Class Series: Part 1

I took my third cooking class this weekend. It is a three-part series, so stay tune for the other two classes. Today, we made three dishes. The first dish was a Summer vegetable ratatouille. The second dish was a vanilla bean soufflé with strawberry sauce. The third dish was pan-roasted chicken with lemon and rosemary. All the dishes were scrumptious. Let's start at the beginning.


The first dish we made was Summer vegetable ratatouille. We practiced our knife skills and proper hold of the knife to prepare all the veggies in the dish. We learned to make things the are spherical flat first. Then, you make sticks. Then, cut the opposite direction to make cubes. This technique was super helpful to get all the vegetables about the same size. Having food cut to the same size helps everything cook at similar rates, so the vegetables are done at the same time. Our group divided and conquered dicing eggplant, onion, red bell pepper, zucchini, tomatoes. We mince garlic cloves and chiffonade the basil.


Start by heating your Dutch oven with oil until shimmery. Sauté all the vegetables, starting with the vegetable that takes the longest to cook. In our case, that is the eggplant. Sauté all veggies until browned. Let everything stew while you're preparing the rest of the meal.


Top with Parmesan cheese before serving and enjoy!

The second dish was la vanilla bean shuffle with strawberry sauce.  I was especially excited to try this dish because it seems a bit intimidating. Ours was delicious!


Start by getting all your ingredients measured and assembled. This is also know as mis en place. Then, separate your egg whites from egg yolks. We used the three-bowl technique for separating eggs. It's a little messy, but it's cheap and easy. 

You start with three empty containers. Crack the egg into bowl 1. Use your hand to grab the yolk. Let the white run through you fingers. Put the egg yolk in bowl 2. Pour the egg whites in bowl 3. Begin the process again until you've separated all the eggs.

Heat butter, flour and milk in a saucepan. It's like making a roux. You melt the butter, whisk in flour and slowly add milk. Then, flavor your soufflé base. We used sugar, vanilla, and salt.  Let the mixture you before whisking in yolks. Let mixture cool.


Next, whisk the egg whites in a stand mixer to get stiff peaks. Fold the egg whites into the soufflé base.  Start with 1/3 of the egg whites. Fold in the remainder of the egg whites in 2 batches. You're almost there!


Prepare ramekins for the batter by greasing with butter and dusting with granulated sugar. Pour a little sugar into the dish and rotated around until it is covered with sugar. Poor off the excess.

Scoop the batter into ramekins.  I like to use an ice cream scoop to help portion. It's neater and more precise than using a kitchen spoon. Then, level the soufflé with a spatula. Run your finger around the edge of the ramekin to chat a moat around the edge. This helps the soufflé rise. 

Place the soufflé in the oven until full risen and golden brown.


We prepared a strawberry sauce to top the soufflé. I preferred the soufflé on it's own; you can really taste the vanilla bean.


The third dish was pan-roasted chicken with lemon and rosemary.  We made the entree while the soufflé were cooking. Prepare your ingredients. Mince shallot, garlic clove, and rosemary. Zest a lemon and juice it. Set butter out. Measure whine and low sodium chicken broth.

Bring chicken to room temperature while still maintaining food safety. Dry the chicken. Start by heating your pan with oil until shimmery. This turns the pan into more of a nonstick pan.


Brown the on both sides. Then, finish the chicken in the oven on a sheet tray topped with an oven-safe baking rack. How do we know when the chicken is cooked?

Insert oven-safe thermometer. Set to 180*F.  When the thermometer reaches 180*F, the chicken is fully cooked. Tent the chicken with aluminum foil and let rest while you prepare the pan sauce. 

Drain the majority of oil from the pan that you seared the chicken in. Don't wash it out! We want to make use of the fond. Fond, what's that? Fond is the culinary term for the caramelized brown bits on the bottom of the pan. It's french for 'background, depth, or bottom." You can think of it as the basis for our pan sauce. 

To make the pan sauce, turn the heat to medium and add butter. Sauté garlic and butter until softened. Deglaze the pan with wine. Let the liquid concentrate by reducing by half. Add chicken broth and flavorings. We used rosemary and lemon zest. Use a wooden spoon to scrape the fond or caramelized bits off the bottom of the pan. Turn of the heat. Add remaining butter. This is called "mounting" a sauce. Mounting a sauce is adding chilled butter. Slowly add the butter and stir to emulsify the sauce. 


All the recipes were super simple to make because all the ingredients were prepped and ready. Many chefs use this technique called mis en place. This is a french term that translates to "put in place."  We measured all the ingredients for each dish and had them ready to go before we started the cooking process. Preparing your mis en place is something every cook can do to make cooking easier. Prepare you meal like the recipe reads. You measure and chop, dice, slice all the ingredients. Preheat ovens or pans. After the preparation is done, now it's time to cook. Try this technique at home to make cooking easier!


I highly recommend taking a cooking class if you want to learn a new skill or try a new recipe. My favorite aspects of this cooking class were:

1) Getting hands-on experience learning a new skill.

2) Recipe preparation and clean up was completed by the staff. No dishes! 

3) Tasting new recipes and trying new foods.

I encourage you to try something new. I don't know if I would have tried to make a soufflé by myself. But, it was simple and successful in class with the help of the chef and sous chefs. Don't be afraid to try a new recipe, and taste something new!


For more recipes, encouragement, and tips for healthy eating, follow me on Pinterest, Instagram, and Twitter. 

SaveSaveSaveSaveSaveSaveSaveSaveSaveSaveSaveSave
SaveSave

Monday, July 18, 2016

Summer Pasta Class


I took my second cooking class this weekend. We made fresh pasta dough and two dishes. The first dish was goat cheese tortellini with charred red pepper pesto and olives. The second dish was linguine with shrimp, Summer vegetables and fresh mint. Both were yummy. Let's start at the beginning.


Our chef instructor prepared the pasta dough ahead of time because it needs to rest. Then, we worked as a team of four to roll the pasta out by using the hand roller. We started at setting "zero," which is the largest opening. Then, we folded the pasta in thirds, then in half. Then we rolled each sheet through the attachment. We at started at setting 1 and progressing through each setting until we reached setting 6. We had fairly thin sheets of pasta that were ready to use for both dishes.

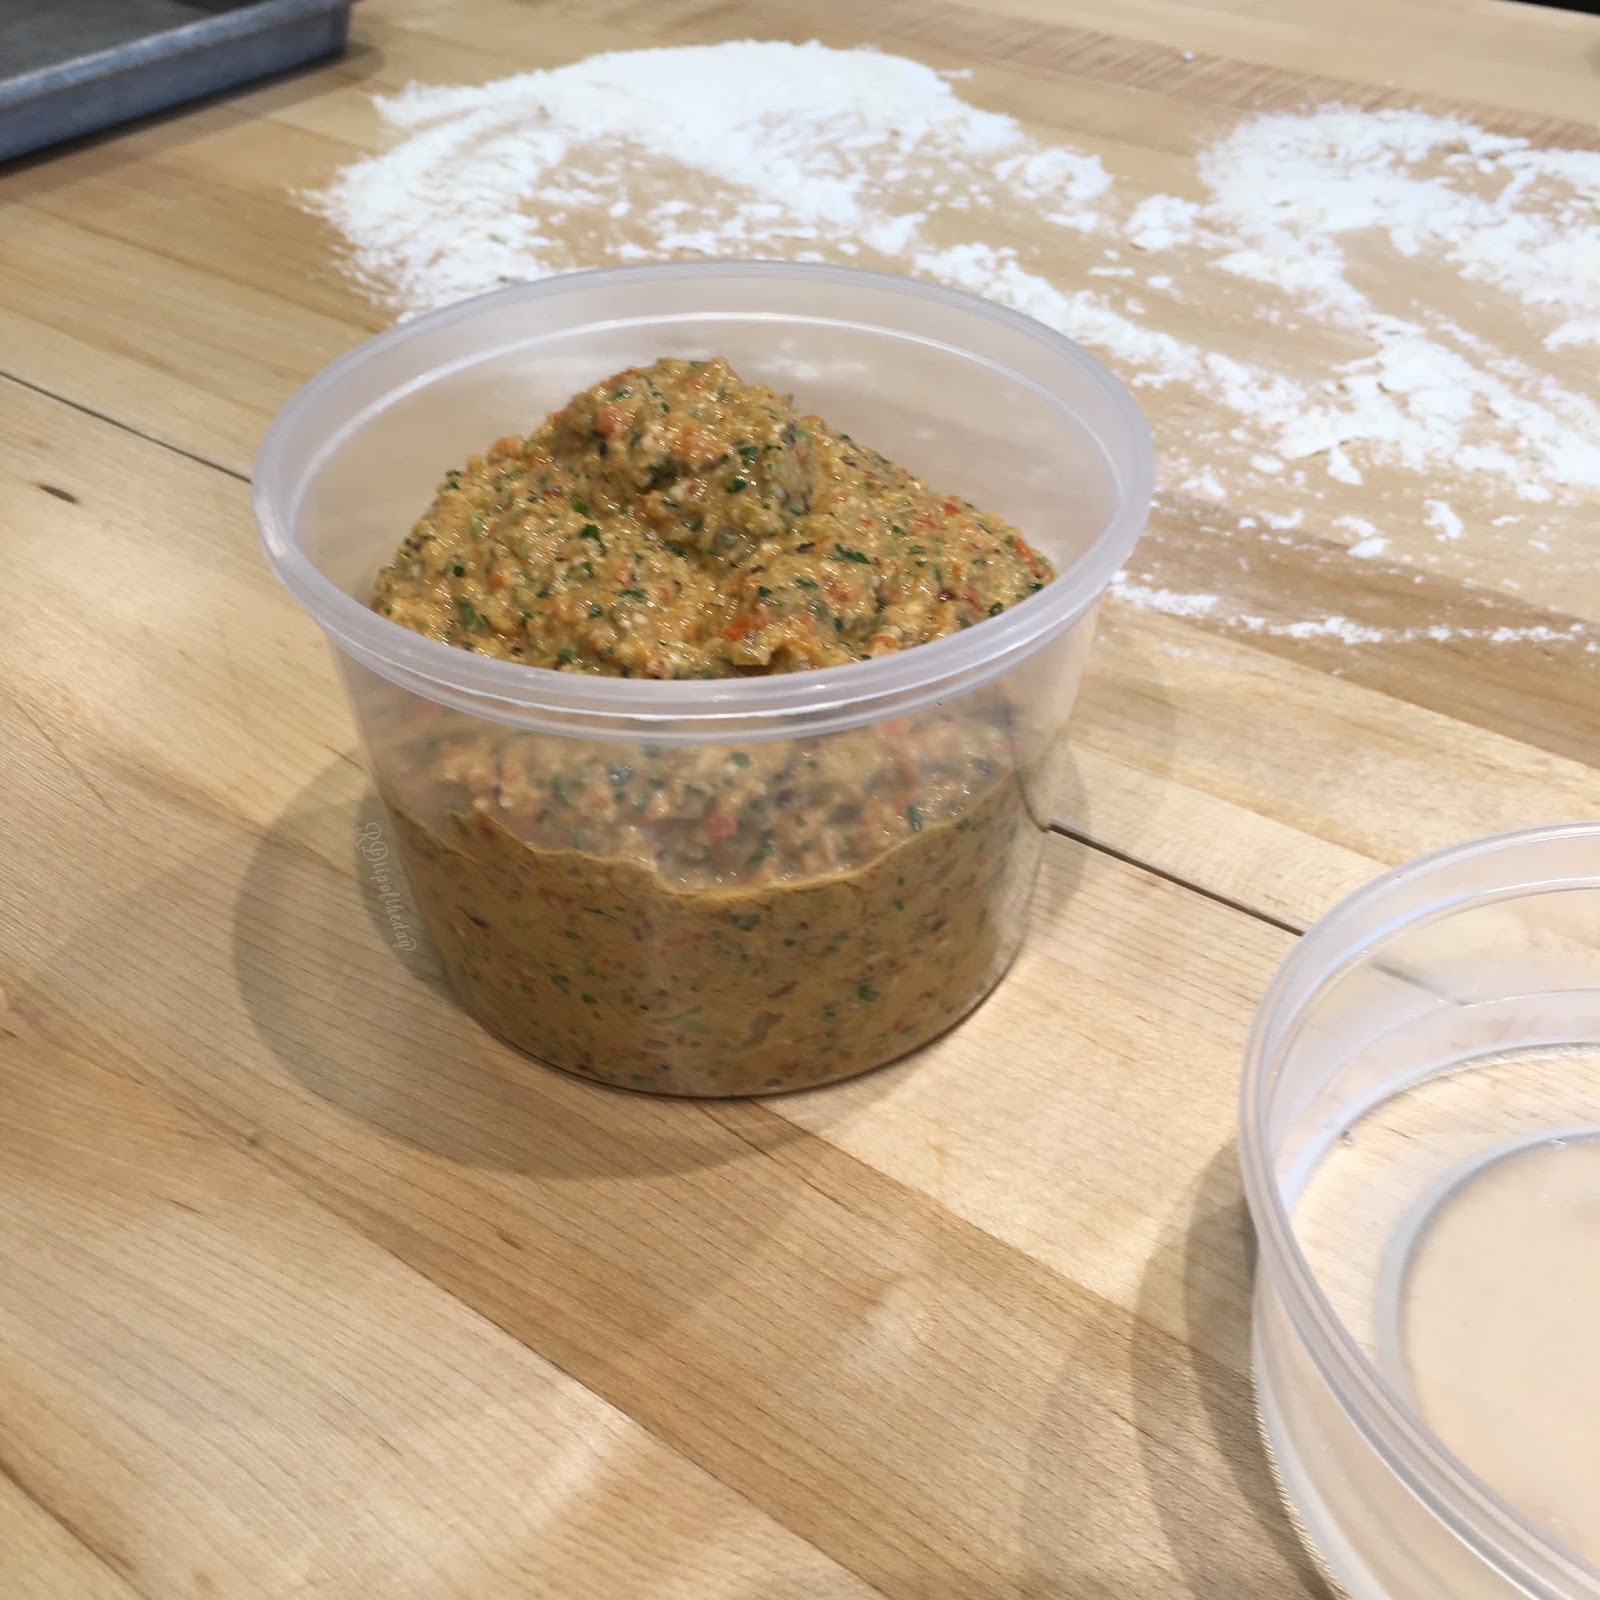
The first dish we made was goat cheese tortellini with charred red pepper pesto and olives. I helped make the pesto for the class. It was super simple especially because all the ingredients were prepped and ready. May chefs use this technique called mise en place. This is a french term that translates to "put in place."  I blended the ingredients for the pesto together in the food processor until there are no large pieces of ingredients and everything is well blended.


Then, we moved to making the pasta dough into tortellini. We cut out 3-inch pasta rounds with a cookie cutter. Placed 1 teaspoon of filling into the pasta round. Dampen the edges of the pasta with water. Fold the pasta in half to make a half-moon shape. Please out all the air bubbles from the inside (by the filling) out. Place a drop of water on the edge of the pasta and loop the two corners behind the pasta to make the tortellini shape. Place tortellini on a floured half-sheet pan and continue forming the tortellini until done.


Boil the fresh pasta for 3-4 minutes until tender, and the pasta rises to the top of the pot. Toss warm pasta with your fresh, Summer pesto, and enjoy!


The second dish was linguine with shrimp, Summer vegetables and fresh mint.

This was the first time I used a pasta cutter. The pasta machine has a cutting attachment you can see in the picture below. It was super simple. After you roll out the pasta to the desired thinness, you feed the pasta sheets through the cutting attachment. And, out comes linguine! You flour the pasta and lay it in flat nests on a baking sheet until you're ready to cook it.


Next, it's time to make the sauce. The ingredients are all out on a sheet tray ready to chop and finish the mise en place. 


Then, you cook the shrimp in a little oil. Add the onion and garlic. Deglaze the pan with white wine. Add the veggies. Cook until tender. Add the herbs. The chef cooked the pasta while we prepared the sauce. Toss everything together and enjoy!


Y'all. I really loved taking these classes. One of my friends came to this class with me, which was extra fun! Learning to make pasta in a class setting was a great experience for me. There was a chef to help coach you. And, there were the chef's helpers who helped clean up the mess. There was quite a bit of flour . . . on everything and everyone in the class. Whoopsies! 

I encourage you to try something new. Invite a friend. Learn something new. Don't be afraid to try a new recipe, and taste something new!


For more recipes, encouragement, and tips for healthy eating, follow me on Pinterest, Instagram, and Twitter. 

If you enjoyed this post, you might enjoy:


Sunday, February 22, 2015

Kitchen School: 3 Tips for Successful Baking

We've all had those baking disasters. Tough cakes, adding salt instead of sugar, forgetting ingredients, the list goes on and on. Is that just me? I didn't think so. Want to avoid these catastrophes? Here are three simple tips to help you become a more successful baker.


1) Be prepared
Read the recipe all the way through. Make sure you have all the ingredients and set the oven for the recommended temperature.

2) Follow directions
For example, add room temperature eggs into the creamed butter." You've added air to the butter by creaming it. This makes the butter wonderfully light and helps make a tender cake. If you add cold eggs, not room temperature eggs, the cold eggs can cause your butter to seize resulting in a flat, dense, tough cake.
Are you wondering what to do while your ingredients come to room temperature? You can try something called "mise en place." It is French for "introduction" but for chefs it means to "put in place." It is preparing all your ingredients before you introduce them to each other in the recipe. It sounds fancy, but it is simply pre-measuring your ingredients. You may have seen this being done by the chefs on Food Network.; they have all the ingredients are measured in small bowls and simply added each as the recipe calls for it.
It makes sense because it keeps you organized, and this is how most recipes are written. Recipes usually start with listing the ingredients and measurements. Then, how to combine the ingredients. And lastly, how long and at what temperature to cook the recipe.
I like the idea of mise en place; it makes me feel chef-y.

3) Check your oven temp
Investing in an oven thermometers may seem silly because the oven usually has one built in. But if you are having a problem with uneven baking, burning, or under cooking, the oven temperature could be the problem.


Seems simple right? Well it is! Every baking failure I've ever had was because I missed one of these things. Everyone has there mistakes, so learn from them and bake on! Follow these three simple steps and you will be a better baker. For more tips on baking better, check out this post on measuring to get the perfect batter or dough.

Follow me, RDtipoftheday, on Pinterest, Instagram, and Twitter for more recipes, encouragement, and tips for healthy eating. You can subscribe to this blog, RDtipoftheday.blogspot.com, through BlogLovin,.

Friday, February 20, 2015

Kitchen School: 3 Tips for Better Baking . . . . Measuring


Baking is a science. You need the right ingredients in the right proportions for the recipe to work. So, measuring accurately is key. Here are three tips for accurate measuring for better baking.

1) Use the right tools
Dry ingredients require different measuring cups than liquid ingredients.


2) Measure accurately
Most professional bakers prefer weighing ingredients to ensure accuracy. If you don't have a kitchen scale, here are some tips for measuring accurately. For dry ingredients, fluff ingredients, like flour, with a spoon before measuring. Then, use measuring cups to collect ingredients. Level with the back of a knife or straight edge. This helps get rid of extra flour without packing it down. You don't want to pack dry ingredients unless the recipe specifically calls for it.
For wet ingredients, place cup on a level surface. Pour liquid into cup and try to get eye level with the cup to ensure accuracy.


3) Measuring sticky ingredients
Spray your measuring cup with non-stick spray before measuring a sticky ingredient. This will help sticky ingredients, like honey and molasses, come out of the cups easily.

Hope these three tips help you bake better! If you liked these tips, here are some recipes to practice measuring: Banana Pecan Bread, Ginger Cookies, and Double Chocolate Brownies. 

For even more recipes and tips for better baking, follow me, RDtipoftheday, on Pinterest, Instagram, and Twitter. 

Wednesday, February 18, 2015

A Tale of Two Spices: Banana Bread and Mace

It amazes me how much I continue to learn about cooking, baking, and nutrition. For example, it is amazing how many spices there are from all-spice to za'atar? There are spices that define cooking from the North, East coast, West Coast, and of course from my beloved Southern states of the USA.

One of the new recipe books that I received for Christmas included a recipe for banana bread and mace. What?!? I immediately thought of the defense spray mace, but this is different. Mace inside the defensive spray is a concentration of a substance from hot chili peppers. Mace that is used in cooking is actually kin to nutmeg.


Nutmeg is a brown spice. When whole, it is an oval-shaped pit. Nutmeg can be found dried or whole. It is a warm spice that pairs well with cinnamon and is used most often in baking. It is also used in some savory cooking. For example, many of the recipes I have for béchamel sauce (aka white sauce) calls for a little bit of ground nutmeg.


Mace comes from the same plant as nutmeg. Mace is bright red and actually surrounds nutmeg when both are on the nutmeg tree.  Mace is more red than nutmeg. The taste of mace is more concentrated and peppery in my opinion.


I hope you've learned a little something today in "RD school" about spice and baking. For more recipes, encouragement, and tips for healthy eating, follow me, RDtipoftheday, on Pinterest, Instagram, and Twitter. You can subscribe to this blog, RDtipoftheday.blogspot.com, through BlogLovin.